Wednesday, February 27, 2013

A Little About Me

I thought I would share a little about myself and this blog. Mostly just for interest sake, and because its my blog so I can do what I want.

I think the stereotypy of a person who likes crafts is something like this: Woman, has kids, stay at home Mom, probably 40+ unless she had kids when she was young, enjoys reading Anne of Green Gables with some herbal tea, and probably owns a quilted purse, jacket, vest, and maybe even pants that they wear regularly. I'm also not saying that I think that is a bad thing, my Mom, who fits many of those things, is my crafting inspiration. I'm just saying its a stereotype.

I am: a Woman, and own a quilted purse. That's it! I don't even really like babies, I am hoping to have a thriving career  I am in my early 20's. I really don't like reading, especially fiction. I drink black tea 98% of the time, and I think quilts are amazing...for beds and couches.
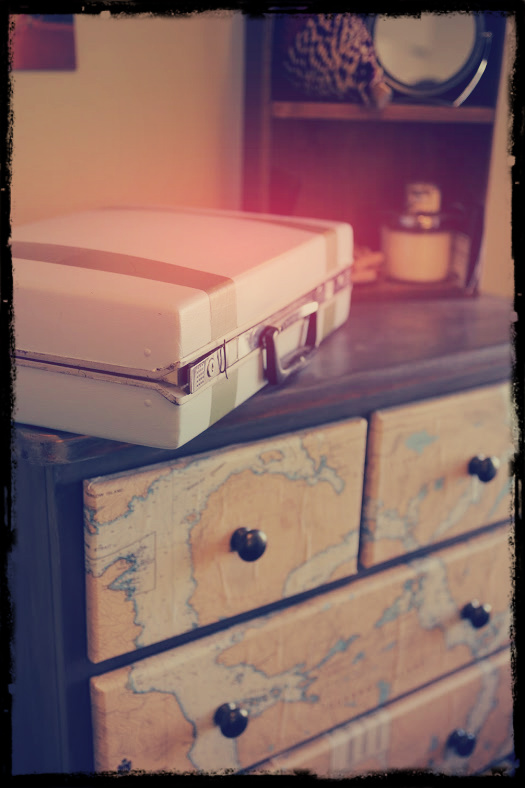
Who knows, maybe I will own something like this when I am 70. Not for now.
I'm not saying all crafters are like that, I actually have some really cool friends that craft. I think Etsy is helping young people that like crafting to realize they are not alone! Its just a stereotype that I don't fit. I also think this stereotype is changing as young crafters are coming out of the closet.

As Far as crafting goes I do it for a variety of reasons:

1-I see something I like and am not willing to spend the money that it costs so I make it myself
2-I have an idea of something I want, and its way cooler when you make it your self
3-I enjoy it. Its a hobby-thats probably the main reason

I started crafting when I was a kid, as I would suspect most kids do. I painted Easter eggs, made Christmas tree decorations, colored pictures, and the whole lot. I hope skills have increased since then :S.
Some classic craft time
I some how knew that painting outside on an easel increases skills
Clearly I was very skilled with stickers
I remember being embarrassed by this painting because
 I was the only person who made a nose the way I did.
I have never done one type of craft, I like variety and want to try it all. I like to refurbish furniture, I crochet, I make jewellery  I am in the process of making all the decorations for my wedding, I love to work with clay, I make headbands, I love to paint, and I'm sure there is more. The only thing that I cant do is sew. This is ironic because my Mom is an amazing seamstress. She used to own her own clothing company. But she never taught me how, and now I can't even patch holes in my jeans.

Im not an expert at any craft because I usually do something once, learn as I go, and then never try again to improve and learn from my mistakes.


Other than crafting I have a normal life. I have a business degree and work as an office manager. I Enjoy sports, but generally am not good at them. I know and love Jesus, and crafting is one of my ways that I worship him. I love the beach and the ocean, I love to volunteer and lean about cultures. One of my biggest dreams and aspirations in life is to make a difference in reducing poverty.

Tuesday, February 26, 2013

A breifcase: From Trash to...Cosmetic Organizer

I have always loved vintage briefcases and suitcases. I remember when I was a little girl, and would go antique shopping with my mom, I would always want her to buy either sewing dressforms, or suitcases. I still threaten to buy her dressforms every year for her birthday and Christmas, but since I have my own place now, I want all the suitcases to myself.

I was leaving my parents house one day and just two houses down I spotted my prize. It was garbage day and there were two briefcases sitting on the curb. My day was complete!

One was brown and only need a 5 min polish to get rid of some dirt. The other was a hard black case that was nice, but now really what I was wanting. So I went on Pinterest to get a few ideas; honestly I didn't find much I liked. Since I don't actually need a briefcase for normal use, I decided I was going to use it as a cosmetic organizer. So I decided to start, and hoped for the best.

What I did:

Photo Credit: David Chung
I taped the metal frame so that I could paint freely. I started with a primer because the case was plastic, and I didn't want the paint to chip off. I then found some blue paint, and mixed a few until I came up with a blue that I liked. I did two coats of the blue to be sure it covered really well. I waited probably a week before I went to the next step, because I want to be sure the paint had time to harden.

I measured out where the green lines should be, and taped the space off for perfect lines. I again mixed a few colors to make sure the green matched the blue. Again, I painted two coats of the green, just because it didn't fully cover the first time. Finally, i took the tape off and was very pleased with the result.

Once I finished the outside I started on the inside. I pulled out all of the insert parts so it was just an empty shell. This was harder than it sounds, because this briefcase was made tough, and the seams were no exception! I cut up an old cereal box and shaped it into small boxes, to use separate the sections.

It is big enough inside to hold almost everything except my hair dryer. Now I can get ready in my bedroom, and not worry about my room mates showering when I want to put on my make-up. Better yet, it is decorative at the same time!


Photo Credit: David Chung


Thursday, February 21, 2013

Dresser: From Boy to Adult

I was in need of a new dresser, because my new place didn't have enough drawers for me to store my clothes. My boyfriend was only using one of the dressers from his bedroom suite, so he offered me the other one.

I already knew that I was only going to be living in my current house for 4.5 months, so the dresser was not a permanent thing. Regardless I could NOT put this dresser in my room. With the combination of sealed pine, and forest green stain, it looked like it belonged to a 7 year old boy. I'm sure it was appropriate when he got it, but it was going to be the downfall of my perfect room (which still, two months later, has only two small pictures hanging on the wall). On top of that I was hoping we were getting married this summer, so I knew this dresser was going to end up in our house eventually.

Since it was still technically Mark's dresser I had to get his approval. I presented him with a few inspirational pictures I found on the internet . To no surprise he picked the one with nautical charts. So I went to work!

What I did:

I took off the nobs and started sanding. I sanded everything down so there was no varnish and almost no forest green stain left. I had to sand the cracks by hand, but I still never fully got all the green out. It was ok to leave a little green in the cracks, because I was planning on having a darker stain on it.

I stained everything, except the front of the drawers, in a medium/dark brown stain. It was my first time staining so I got it everywhere-I have no tips to avoid this. I'm a messy person. The stain dried quickly and I was able to seal it the next day. I added a very small amount of spare white paint to the varnish.* This allowed me to lighten it up and to achieve a greyish vintageish look that I was wanting. I have done this to most of my other projects so it all matches. I applied a second completely clear coat of varnish for extra protection. I was able to move it to my room the next day, but didn't put anything on top for at least a week to give time for the varnish to harden.

Photo Credit: David Chung
I went to my local marine store and bought a chart. I picked the one of Quadra Island because it had significance to Mark. I pulled out the drawers and measured how the chart would fit on them. I was delighted to find that the chart was the perfect size! I cut out the chart so it was slightly bigger than the surface of the drawer. I then put a glue and water mixture on the surface of the drawers and placed the chart on top. I folded over the corners onto the back, and sealed everything with more glue and water.** I gave 3-4 coats of glue depending on how thick each coat was to fully seal the chart.

Finally I spray painted the nobs with a metallic bronze, so that they would look brassy and not woody.
Here is the final product!


Photo Credit: David Chung


*Water base with water base
**Tip: The chart bubbled a little bit after it began to dry (right side of middle drawer). This can be prevented by sealing the chart with glue and water before placing it on the drawer.